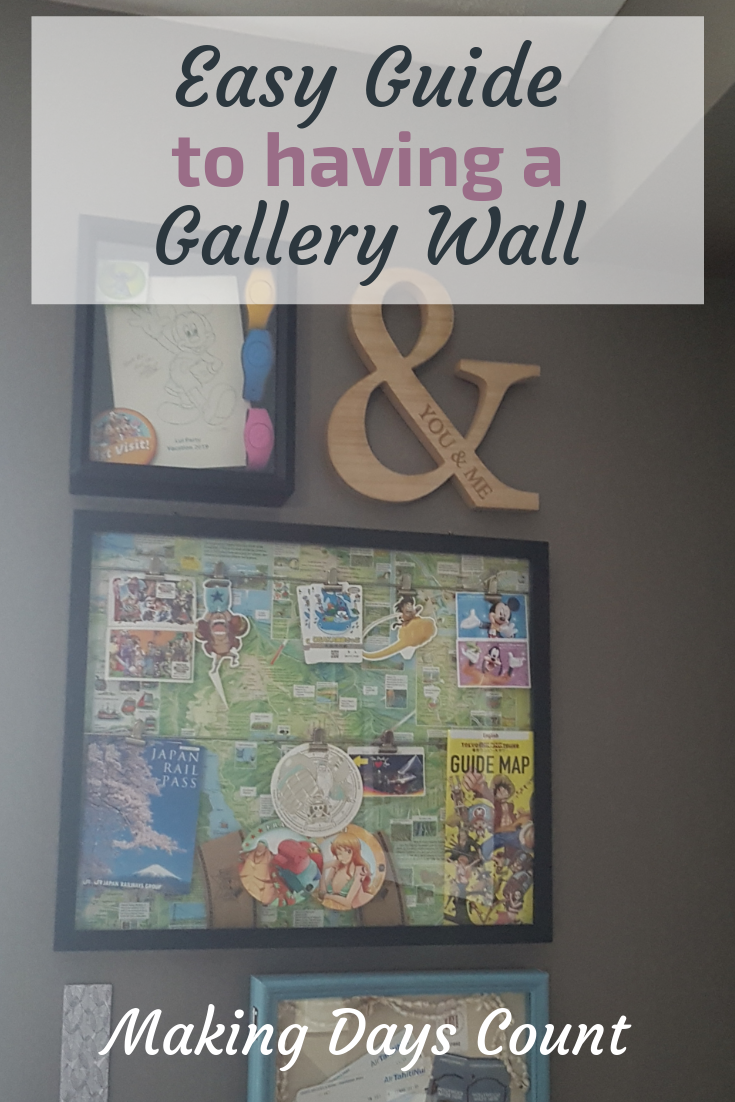
Do you collect items from your travels and put them in a box? I started to collect items for my shadow boxes and did not know what to do with them. One day, an idea popup into my head that I have this wall beside the piano that I could use as a gallery wall. It would be perfect.
If you did not know, I can binge watch interior designing and renovations shows such as Fixer Upper or Mr Kate or The Sorry Girls (Yay Canadian!). I love watching these shows on YouTube and TV if I get a chance to. They inspire me to make my house to look better, so I start small projects to improve one space at a time such as this gallery wall.
Before I continue, I want to let you know that the method of hanging these shadow boxes are very similar to the box shelves post I wrote about before. If you are interested in doing a quick and affordable upgrade for your bathroom, be sure to check out that post after this one.
Pin this for later!
Contents
Here is how I made a gallery wall with my travel shadow boxes:
BY CLICKING THE LINKS AND MAKING A PURCHASE, I MIGHT BE EARNING A SMALL COMMISSION AT NO ADDITIONAL COST TO YOU. PLEASE SEE OUR FULL DISCLOSURE FOR MORE DETAILS.
First, this is a list of the materials and products I have:
- 3 Shadow Boxes of different sizes (You can get yours online here)
- Level tool (I got mine from the Dollar Tree, but you can get it online here)
- Decorative Items (wood decorative items online here)
- Nails and Hammer
- Paper (I used old Christmas wrapping paper)
- Painter’s tape (similar one here)
- Scissors
- Pen or Pencil
- Measuring Tape or Ruler (similar one here)
Next, trace the shadow boxes on the paper and cut it to size.
Place your paper on the floor and your travel shadow boxes above it. Using a pencil or pen, trace the outside of the box. You might want to go over it a few times so that it is dark enough for you to see and cut it out.
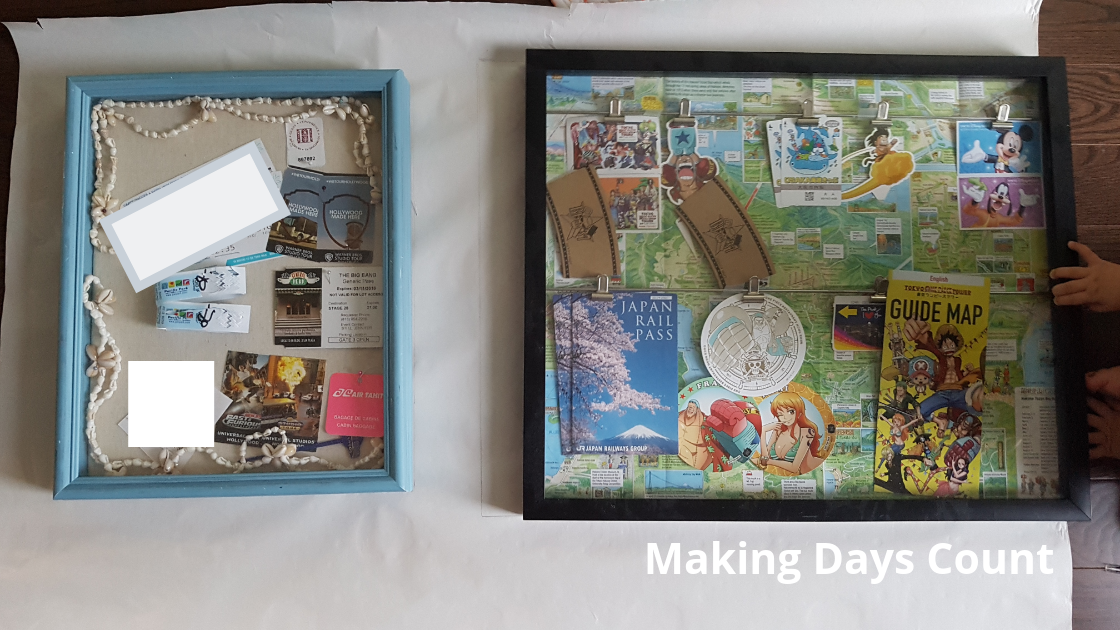
Be really careful when you are tracing these shadow boxes when they are filled. The items in the box can shift easily if you are not careful when you place them down.
It will be a lot easier if you trace the shadow boxes while they are empty, but I did not as I already filled them up and did not want to redo them again.
Third, tape the paper on the wall with painter’s tape and adjust it to the formation of choice.
Take the painter’s tape and tape your paper on the wall where you want your gallery wall to be. Using this type of tape will allow you to remove it without affecting the paint later on.
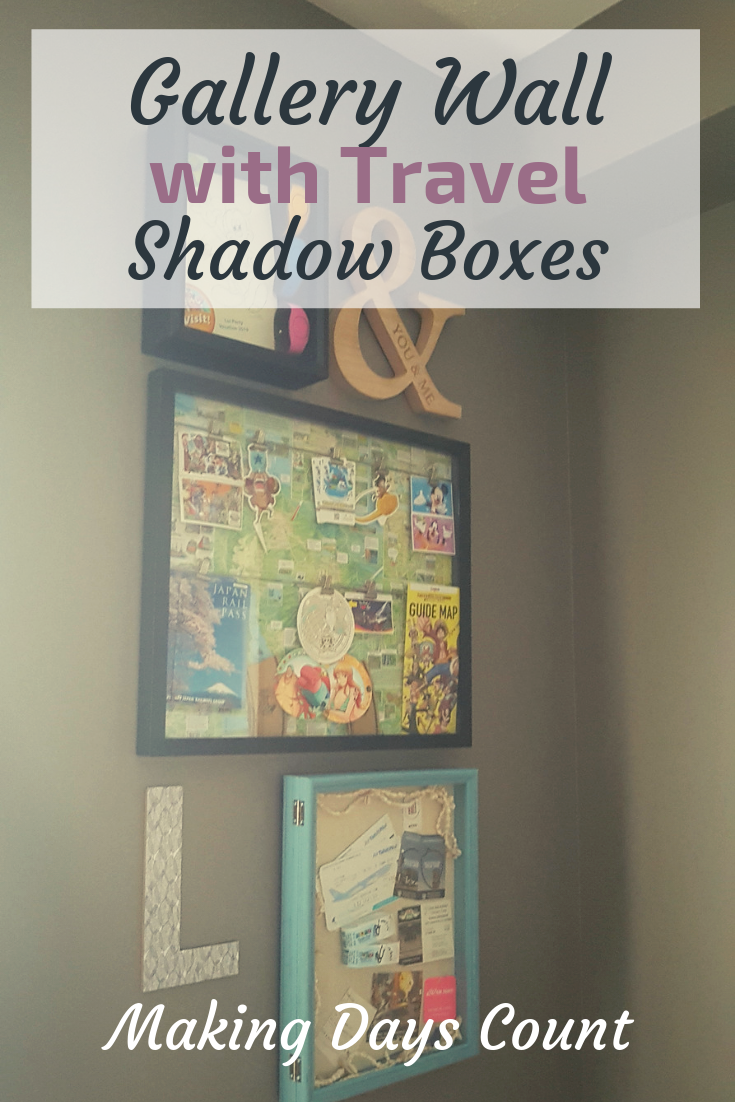
I had three different sizes of shadow boxes so I knew that I wanted the biggest one to be in the middle. Due to my wall space availability, I could only put them in a vertical formation which was fine.
I would like to note that I thought I took pictures of this step and future steps, but I could not find them on my phone. So sorry! If you would like a visual of what they should look like, please look at my Display Box Shelves post.
I placed the biggest one in the middle at eye level and played around with the other two papers.
One option: Put both papers at the bottom of the biggest paper and add decorative items on the top. I did not like this idea as it might seem a little unnatural and not really going with the flow.
Another option: Stagger them where one paper is above and the other below the biggest piece in the middle. I ended up going with this idea as it looked so much better (in my opinion, anyway).
Fourth, measure with a level tool to make sure that they are straight.
Once I am happy with everything, I took out the level tool to check that the paper are straight. I only measured the top line of each of the paper.
I find that sometimes our eyes can deceive us so with the level top, this gallery wall would be perfectly level.
Fifth, measure where the holes are on the shadow boxes and mark them on the paper.
I took a measuring tape (you can also use a ruler) to measure the distance of the hole at the back of the box shelves. There were two measurements, one was from the top of the frame, and the other from the side. This way, it would be accurate when I mark them on the paper taped to the wall.
Write down the measurements for each of the shadow boxes. This is really different from the box shelves because they are not a set like the box shelves are. If you need to double or triple check your measurements, it’s probably better.
Sixth, check to make sure that the marked holes are leveled.
Just like step four, check your hole markings with the level tool to confirm that the holes are leveled as well. You want it to be perfect because it will affect the final hanging of your shadow boxes.
Finally, put the nails in and hang your shadow box and add the decorative items.
Nail where it is marked and hang your shadow boxes up as a part of your gallery wall.
At first, I did not have any decorative items and only the shadow boxes. However, I looked back at my gallery folder on my phone and remembered of items that I took pictures of that would match this gallery wall.
So yes, if you see me taking random pictures of items I like (cough cough M), there might be a reason why. I could actually go back and get the items for my gallery wall. Yay!
Thanks for reading and following this tutorial. If you like DIY projects, please be sure to check out my other DIY blog posts here:
If you like what you read, please pin the image below and share it with others. Thank you very much.
Leave a Reply