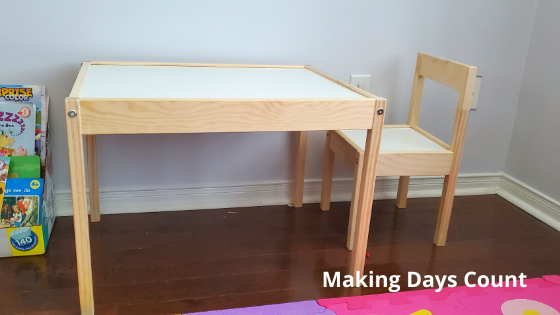
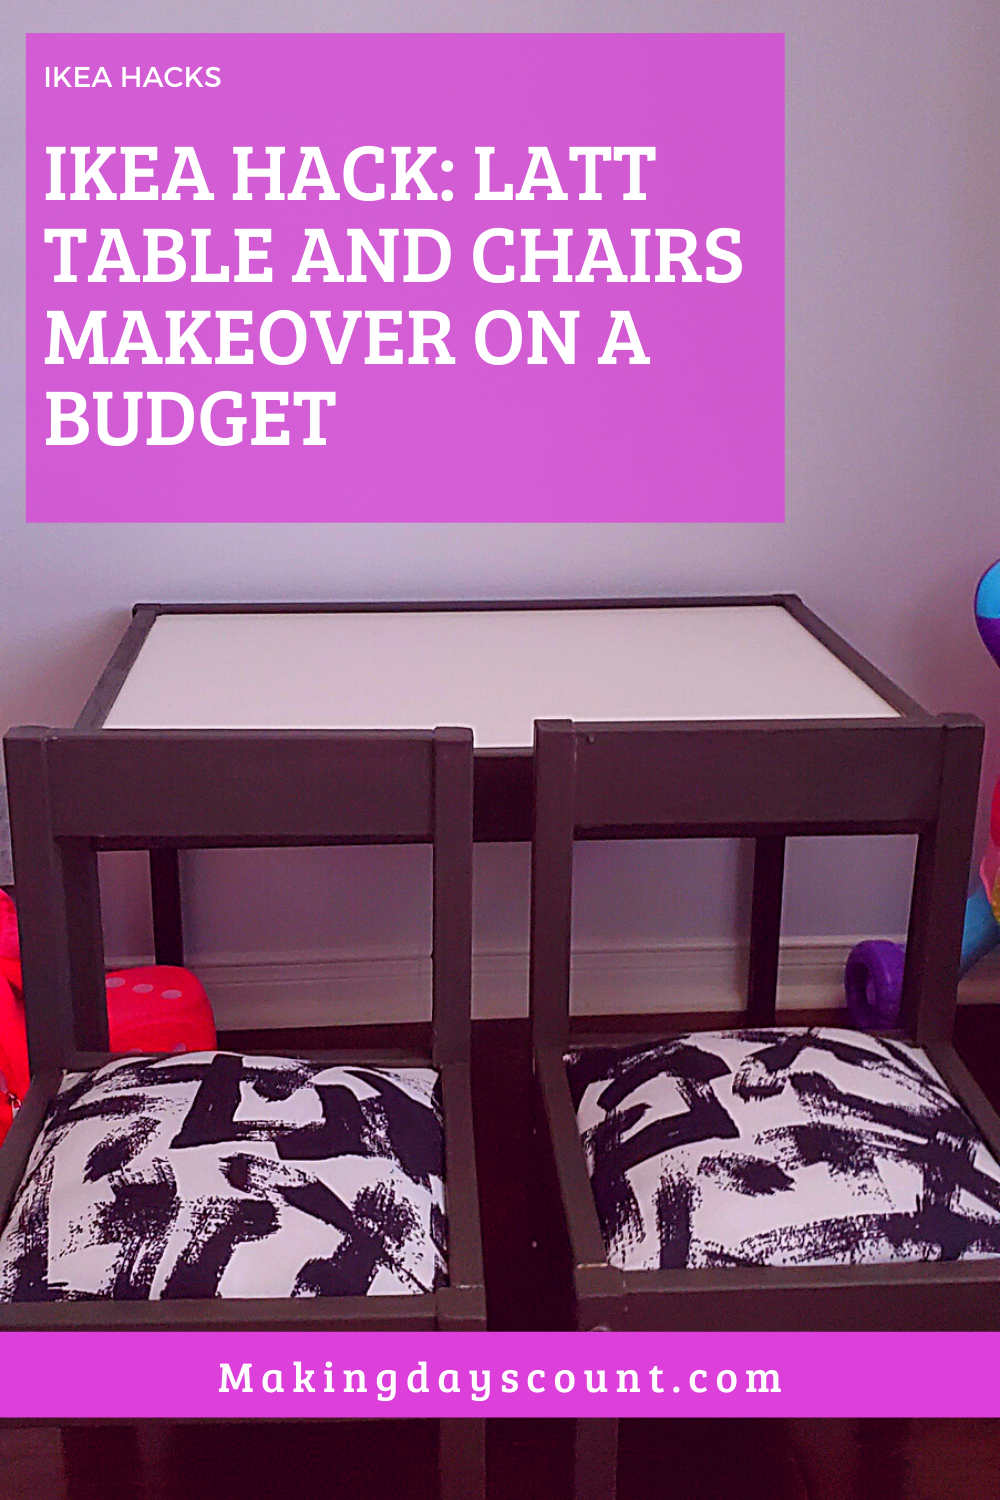
IKEA hacks are so much fun to read and try out. I wanted to get this IKEA Latt table and chairs for my daughter, especially during the pandemic. It’s nice for her to sit at the table and play with her toys or do some coloring.
However, I did not really like the bare look that this table had.
So, I turned to Pinterest and found a few really great ideas on how to customize and give the IKEA Latt table a makeover.
The goal was to make it as cheaply as possible. And I did it and you can do it too!
I was able to spend less than $40 including the IKEA Latt table and chairs because I had some of the materials from my previous projects.
However, I believe that you can do it too on a budget.
Pin this for later!
Contents
Here is how I give my daughter’s Latt Table and Chairs a makeover:
BY CLICKING THE LINKS AND MAKING A PURCHASE, I MIGHT BE EARNING A SMALL COMMISSION AT NO ADDITIONAL COST TO YOU. PLEASE SEE OUR FULL DISCLOSURE FOR MORE DETAILS.
Here is what you’ll need:
- IKEA Latt Table and Chairs
- 1 IKEA Turill Cushion
- Paint of your choice (I used Behr Paint and Primer from Home Depot)
- Water-based sealant (this one is the one I’m planning to use)
- Staple gun (this is a similar one)
- Staples for the staple gun (this is the same brand)
- Scissors
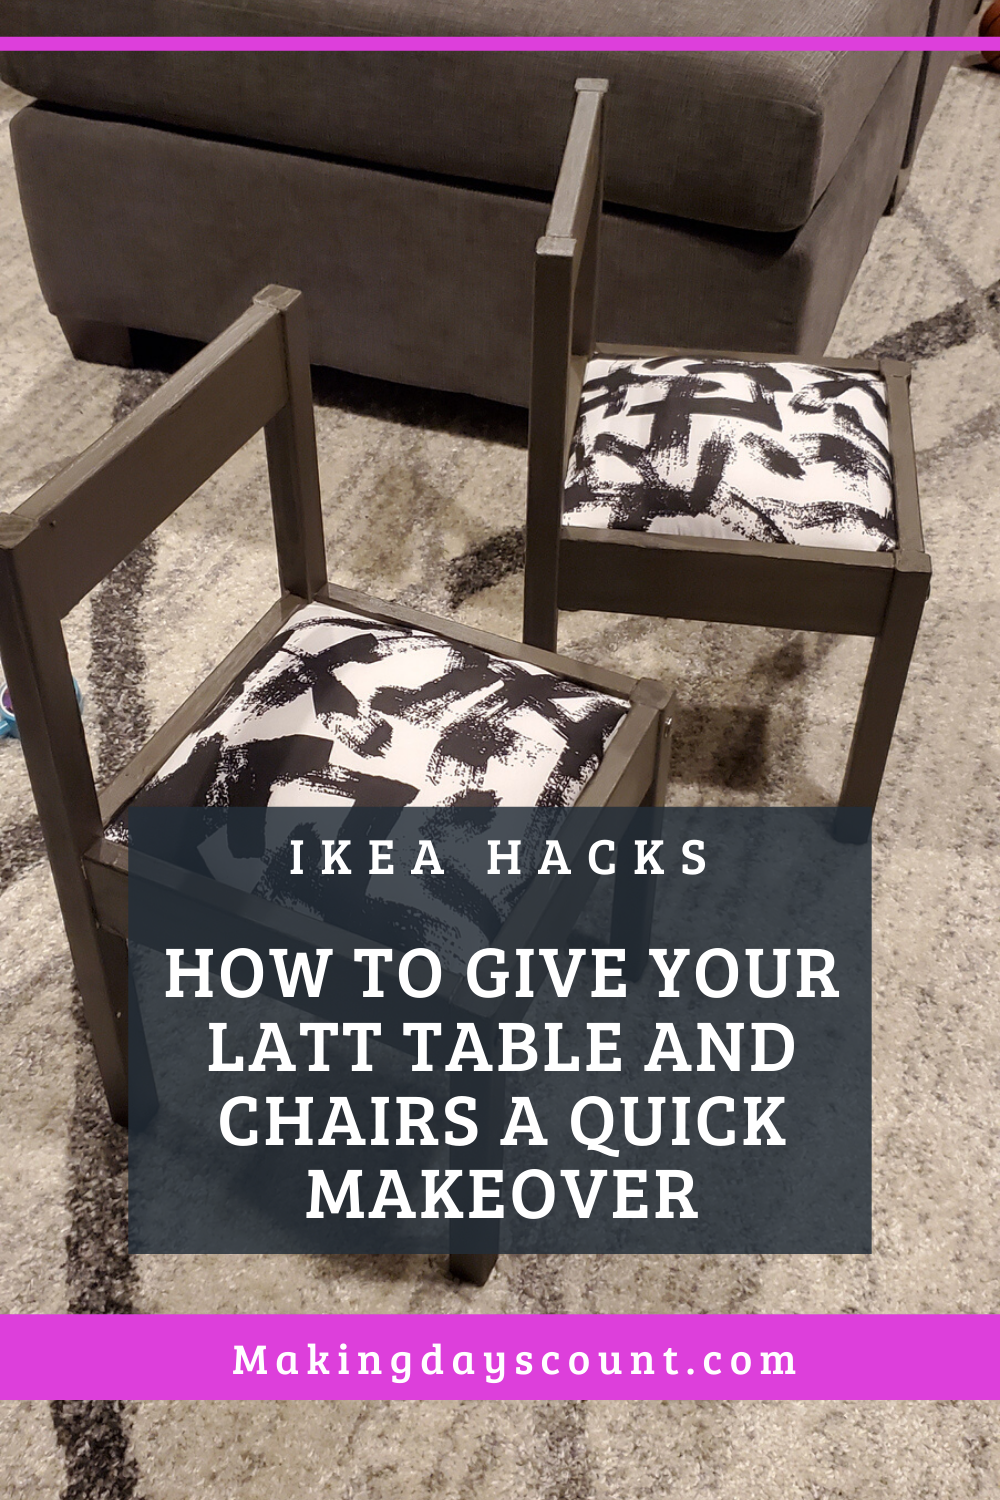
1. Paint the wood part of the table and chairs
First, I painted the bare wood part of the table and chairs.
I decided to use the Behr painter and primer in one so that it’s easier.
It was a good thing that M (my husband) had some leftover paint from his projects so I was able to use them and not spend any money.
With the table and chairs, I decided to paint them outside even with the no VOC.
You can decide whether you want to paint each pieces individually or together like I did. Please see picture for reference.
They needed about 2 coats and it was good to go.
I would also highly recommend putting a sealant on it as the paint can come off, especially with kids around.
Here is where you do as I say, but not as I do. We haven’t bought the sealant that I want, so I haven’t put it on. But, I will and I think it’ll make such a difference.
2. Let them dry
Let your pieces dry overnight and a good amount of time before you put additional coats and the sealant.
It’s so important to give it more drying time than less.
3. Cut open the IKEA Turill Cushion
The next part that I worked on was the cushion part of the chairs.
When I went to Ikea, I picked up the Turill Cushion.
It’s really inexpensive, but it was not firm enough for my couch.
So I had them lying around the house and realize that it would be perfect for this IKEA hack project!
The plan is to take the Turill cushion apart gently and reuse them for the chairs.
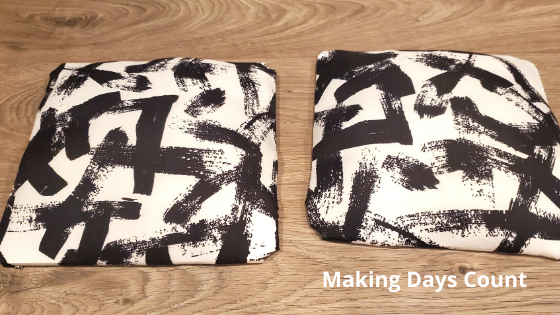
I cut open the seams of the cushion, using each side as the fabric for each seat.
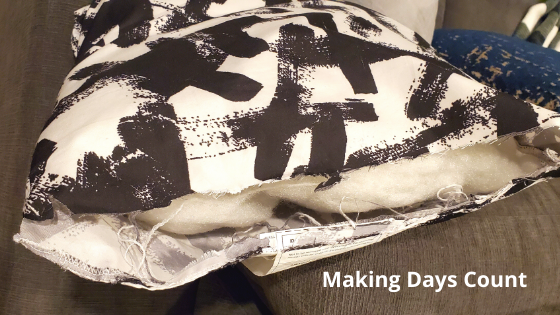
Save the fabric and the fluff inside for your cushion seating.
Please note: I’ve read other bloggers recommending to put foam. It’s probably sturdier than the cushion fluff. However, it’s pretty expensive to buy foam (at least based on my online research here in Toronto) as compared to the IKEA Turill Cushion. If you can find affordable foam, you can try using that instead of the cushion.
4. Make the formation of the Turill Cushion and the IKEA Latt seat
Here is one of the exciting parts for me in this IKEA hack project.
First, place the nicer side of the fabric facing down.
The next thing you want to do is to divide the cushion fluff into two equally.
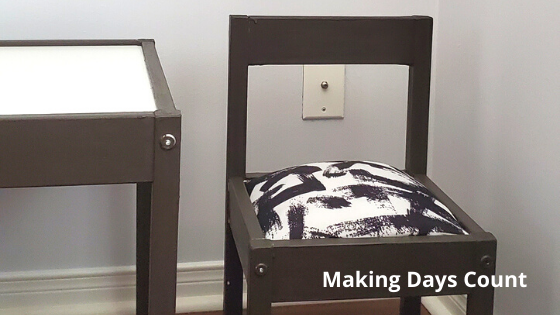
Afterwards, put one of the fluff on top of the fabric followed by the square piece of the chair.
Please see picture for reference.
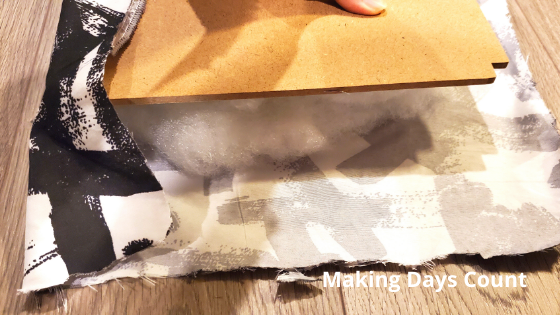
Adjust the fluff to fit the square piece of the chair. There is no exact way but just do as you see fit.
5. Staple the back of the seat
Now, you want to pull the fabric snugly to the square piece and staple it down.
With a staple gun (similar one here), you want to be careful with your fingers. It is best to staple one end and then the opposing side.

This way you can make sure that the fabric is snug and it’ll give you a smooth cushion.
This was my first time doing this type of IKEA hack, so I did have to remove the staples and adjust the fluff where it was lumpy on one side compared to the other.
Staple all around to keep the cushion snug.
6. Remove any additional cloth
As you might notice, there are additional cloth just sticking out beyond the staples.
Just cut them out with your scissors.
If you want to make the bottom look of your chair nicer, you can always add a ribbon or a mesh net like this one.
7. Put the table and chairs back together
The best part of this IKEA hack is to putting the table and chairs together.
With the chairs, you want to slowly slide the cushion part in. You might need to give it a little wiggle here and there.
It’ll come together and you might do a little dance like I did.
The table should be pretty easy to put together as well.
If you are unsure, check the IKEA manual to see how to put it together.
8. Let your kids enjoy your IKEA hack and makeover
When I was done assembling the IKEA Latt Table and Chairs, my daughter had just woken up from her naps.
It is so satisfying to be able to work on these projects while they nap.
She went to them and wanted to sit on the chairs right away.
It is still a little tall for her to get on it, but she enjoys sitting in it and asks us to sit on the other chair.
So, go try this project out and let me know how it goes! Please tag me on Instagram @makingdayscount and I would love to post them on my stories!
Related:
- Budget DIY Projects to Make Your Home Look More Expensive
- Tips on How To Decorate Your Home on a Tight Budget
- 10 Easy Ways to Declutter Your Home
Thanks for reading this post on “IKEA HACK: Latt Table (and Chairs) Makeover”. If you like what you read, please pin the image below and share it with others.
Leave a Reply