Mother’s Day is coming up and you need a last minute Mother’s day gift for the grandmothers. Don’t worry, I got you.
It is sometimes difficult to buy things for them who either have everything they need or can buy the items they want. I was thinking what can we give that the grandmothers will appreciate.
An art project came to mind.
This is a simple DIY that Baby K and I made for their grandmothers.

Contents
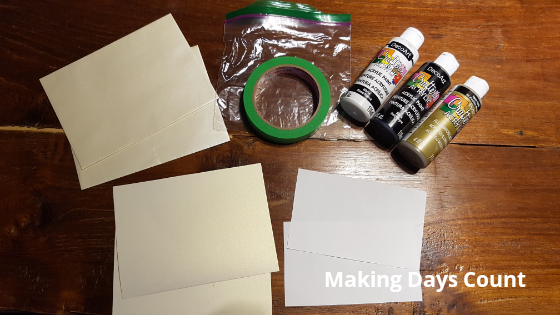
Here is what you will need:
BY CLICKING THE LINKS AND MAKING A PURCHASE, I MIGHT BE EARNING A SMALL COMMISSION AT NO ADDITIONAL COST TO YOU. PLEASE SEE OUR FULL DISCLOSURE FOR MORE DETAILS.
- White paper
- Cardstock or construction paper
- An envelope for each grandma
- Painter’s tape
- Different colours of Acrylic paint (Mine is from the dollar store)
- Mod podge or glue (not pictured)
- Ruler (not pictured)
- Scissors (not pictured)
- Sandwich bags
The art project is inspired by a Pin I saw on how to entertain a 6 to 8 months old. The original version was to tape the paper on the floor, but I didn’t. I did the project on the table instead.
Let’s get into it!
Here are the steps for this last minute Mother’s day gift:
Step one: Measure your papers and envelopes
My cardstock were 5″ x 7″ each. They were leftover from my wedding invitation.
I wanted the paper to be smaller so I cut them into 4″ x 6″ each.
The envelopes were also leftovers from my wedding so they were perfect.
If you are using regular letter envelopes, cut your cardstock or construction paper to the same size as your envelope.
Step two: Put painter’s tape on your regular paper
Cut your painter’s tape to the length and width of your choosing and make your own design on the paper.
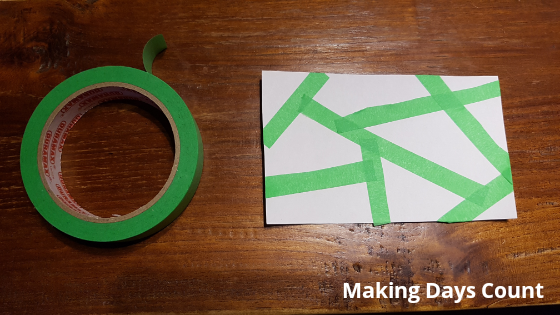
As you can see, mine were random designs.
Have fun with it and create what you want (more like whatever time you have while the baby is occupied, for now).
Step Three: Tape down one sandwich bag
The reason for the sandwich bag is so that neither you nor your baby’s hands will be messy from the paint you’ll be playing with later on.
Leaving the opening for you to insert the regular paper, tape down the other 3 sides of the sandwich bag.
I taped it on a table so that I can support Baby K while she focuses on this art activity without the distraction of her toys.
Step Four: Drop the paint on the paper
Take the acrylic paints that you have and randomly put them on the paper.
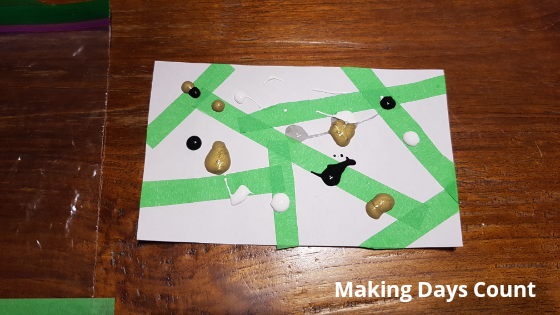
What I realized was that I needed more than I initially thought. So, more is better here.
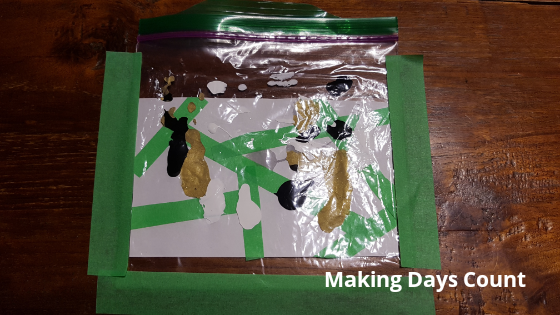
Step Five: Insert the paper into the sandwich bag
The paint will get smeared, but that’s alright. It is part of the process. Now you can use the painter’s tape to tape down the remaining side.
Step Six: Messy time
I picked up Baby K from her play mat and put her in my lap. She loves to hit the table with her hands.
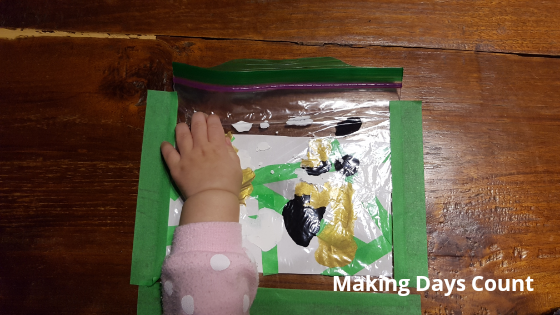
I placed her hands near the sandwich bag and encouraged her to hit it, causing the paint to smear and go everywhere on the paper.
When she was done, I put her back on the play mat and remove the paper from the sandwich bag to dry.
Step Seven: Glue the papers together
After the painted paper had enough time to dry, put mod podge on the back and press it firmly against the cardstock paper or construction paper.
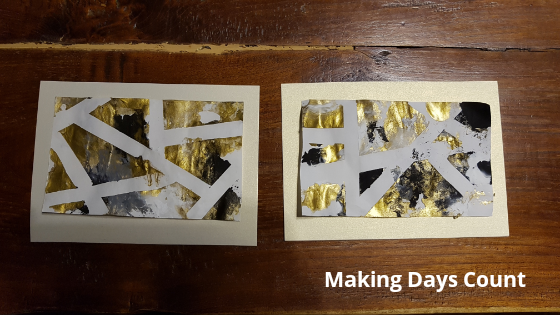
You can also add mod podge over both papers to create a shiny, finished look.
Step Eight: Add a personalized message
Since Baby K is young, we wrote it for her. If your kids are older, they can write it themselves.
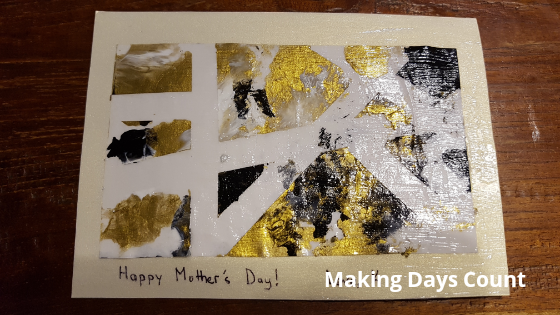
Put the finished art piece/ card in your envelope.
Watch the surprise on the grandmothers’ faces when they find out their grandbabies made them this special gift!
If you make it, I would love to see it. Tag me on Instagram @makingdayscount or email me at becca@makingdayscount.com.
Related:
1. Easy DIY Clothing Organization Label
3. Budget DIY Wedding Projects I did for my wedding
Like this post, please pin it. Thank you.

Leave a Reply