Contents
Two-Tone Colour Pom Poms DIY

Have you ever seen those two-toned color tissue paper pom poms on Pinterest or on some party website? It’s really easy to make and yes, even you can too!
BY CLICKING THE LINKS AND MAKING A PURCHASE, I MIGHT BE EARNING A SMALL COMMISSION AT NO ADDITIONAL COST TO YOU. PLEASE SEE OUR FULL DISCLOSURE FOR MORE DETAILS.

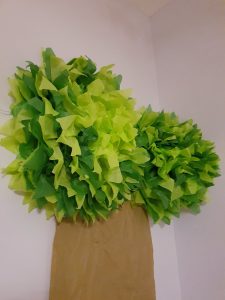
I wrote about how to plan a bridal shower, I showed these beautiful two-toned colour tissue paper pom poms that were representing the leaves of the trees. If you want to read more about planning a bridal shower, check out my post here.

It’s really simple.
All you need:
- a pair of scissors
- two packs of tissue paper (You can get them from the dollar store, or you can get this multi-colour pack from Amazon [Affiliate Link])
- twist tie or something similar.
At dollar stores, the tissue paper packs either come in a set of 20 or 8 and are usually about 20″ x 20″. Just get two colours that you like or think will match.
Let’s begin:
You will need 12 layers in total. This will give the poofiness and fullness that makes a pom pom look grand.
First, you want to determine the size of your pom poms.
If you want the largest size like mine, then you do not need to cut the tissue paper. If you want it to be slightly smaller ones, you can cut into halves or a quarter.
Next, you want to stack it up.
Option 1:
Alternate colours. So, Colour A, Colour B, Colour A, Colour B, Colour A, Colour B, and so on.
Option 2:
If you want one of the colours to be dominant and the other as an accent, you can do this:
From bottom up: 2 Colour A, 1 Colour B, 2 Colour A, 1 Colour B, 2 Colour A, 1 Colour B, 1 Colour A, 1 Colour B, 1 Colour A.
This way you will be starting and ending with the same colour with a handful of the second colour as an accent.
Option 3:
If you want them to be completely separate but in the same pom poms, you can do half Colour A and half Colour B in top of it.
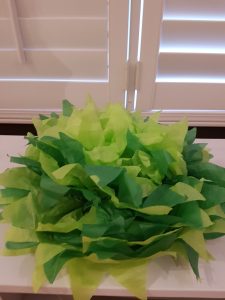
I chose to do option 2 as it is fitting with the theme I was going with – the two-toned leaves on a tree.

Second, fold in an accordion style from one end to the other.
You can fold about 2 inches for large ones, 1.5 inches for medium ones, and 1 inch for small ones.
Third, secure the middle.
Tie a twist tie or a floral wire around the middle of the pom pom to make sure that everything stays in place.
Fourth, cut the edges with your scissors.
Usually, there are two types of edges, a round one or a pointy one. You can decide which one fits better for you. Or, you can create and cut your own pattern at the edge.
Fifth, decide if you want a full pom pom (circular ball) or a half pom pom.
If you are making a full pom pom, you need to decide whether you are going to tie it up and hang it or just leave it on a flat surface. If you are tying it up, you’ll need to tie a string on the twist tie or around the pom pom and have at least 1 feet or 12 inches remaining to tape to the ceiling or tie on a light fixture.
However, if you’re making a half pom pom like me, then you do not need an additional resources.
Final step, you open the pom pom up.
Related: How to fluff your tissue pom poms
If you are making a full pom pom, open half on one side and half on the other. If you are making a half pom pom, you just need to open the pom pom on one side.
Some additional notes:
Be careful as you pull up each individual layer because you do not want to rip them. Try to pull them as high as possible and close to the centre.
It is okay not to pull up the last few layers, but it’s a good idea to separate them from each other. You can then fluff the pom pom by putting your fingers in and gently comb through them like running your fingers through your hair.
That’s pretty much it. Once you figure it out, you can make so many in all the different colours (Amazon multi-colour pack [Affiliate]) that you like.
I would love to see your Pom Poms, please tag me on Instagram at @makingdayscount.


Leave a Reply