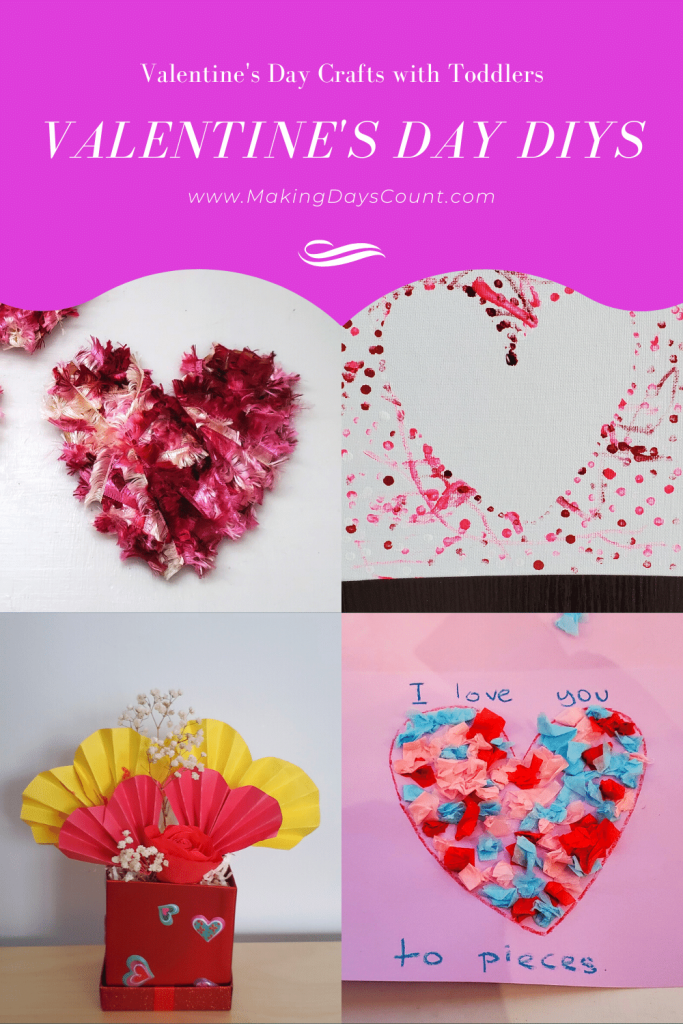
Valentine’s Day gifts do not need to be expensive. After all, it is about expressing your love to the other person. In this blog post, I will share with you 7 DIYs you can easily do, with your toddler, to make these Valentine’s day gifts.
These budget gifts are simple and you can easily get the materials from what you have at home or at your local dollar store.
I love creating these crafts with my toddler, especially when we can give it to others.
These DIY Valentine’s day gifts are made for my daughter’s grandmothers since they are two really wonderful women and role models in my daughter’s life.
Pin this for later!
Contents
Here are 7 valentines day gifts you can make on a budget:
BY CLICKING THE LINKS AND MAKING A PURCHASE, I MIGHT BE EARNING A SMALL COMMISSION AT NO ADDITIONAL COST TO YOU. PLEASE SEE OUR FULL DISCLOSURE FOR MORE DETAILS.
1. Heart fan for Valentine’s day
What you need:
- Paper (I used construction paper, you can get some online here)
- A pen or crayon
- Scissors
- A round object bigger than the paper size
- Glue
Here are the steps:
1. Fold the construction paper in half. My paper was about 9″ x 12″ originally so it was too big. You can leave your paper as is or fold it in half or into 3 equal parts depending on the size of hearts that you want.
Your paper size is up to you, but please be sure that it is in a rectangular shape before the next step.
2. Using your round object, trace it around the paper. Please note that your round object is bigger than your paper.
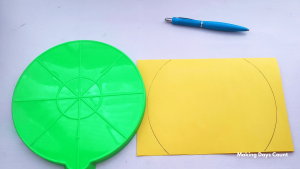
3. Cut out your paper and it should look like the image below. Decorate it (or ask your toddler to draw on it or put stickers on it.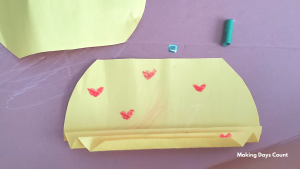
4. Fold your paper like a fan in accordion style either up down or from bottom up.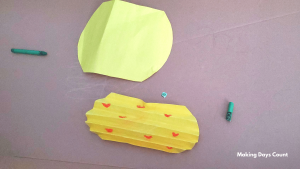
5. Once you are done folding, just like the picture above, fold it in half like a fan and glue it together.
If you want to put it on a stick, be sure to secure it with tape or hot glue if necessary.
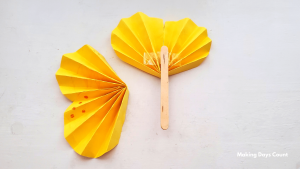
Now you are done. You can give it away as a Valentine’s day gift, or put it together in a gift box similarly in my next DIY.
2. Valentine’s day gift box with a rose
What you need:
- Paper hearts on a stick (Please refer to DIY #1)
- A cube box
- Floral foam blocks (I got mine from the dollar store, but you can get some online here)
- Stickers
- Hot Glue
- A rose (made with my flower kit)
- Baby Breath (Can be faux)
- Shredded paper (optional)
Here are the steps:
1. First, get your toddler to decorate the outside of your box. The stickers can keep them busy for awhile, but it might get everywhere if we don’t watch them carefully.
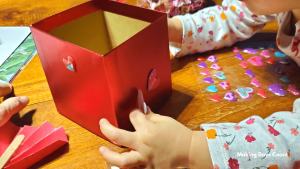
2. Put your floral foam blocks inside. Put some hot glue to secure it to the bottom of the box.
You might have to cut it down if it does not fit properly. Mine was from the dollar tree and it fit a little smaller, but that is fine.
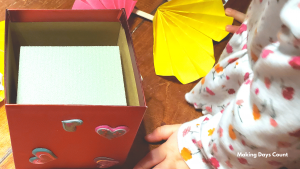
3. Add your paper hearts on a stick (refer to DIY#1) and also your rose (from my eBook and templates here) to the box.

As you can see in the picture above, I’ve also added the baby breath to the front and back of the arrangement. Also, I covered the floral foam with some shredded paper from my New Year’s Eve box to make it look nicer, but that’s optional.
3. Q-tips Valentine’s day gifts: Canvas art
What you need:
- Canvas (Mine was 8″ x 8″ from the Dollar Tree, similar one here)
- This paper template (download here for free)
- Q-tips
- Paint (I used pink, red, and white acrylic paints)
- Cups for the paint
- Space for painting
- Painter’s tape
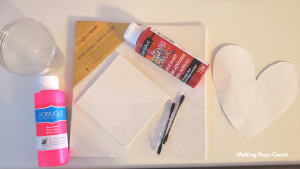
Here are the steps:
1. Setup your painting station. This is a place where you want to make sure that your toddler cannot just run around with paint in their hands.
For me, I put painter’s tape at the back of the canvas, stick it onto an old box cover. Also, I added a little paint on the cups as you do not need a lot for this art project.
2. Cut out nicely the heart from the paper template (free download) and tape it with painter’s tape (on the back) in the middle of the canvas.
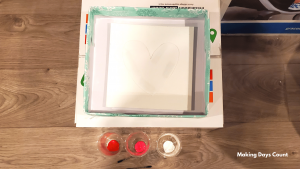
3. Put the Q-tips in the cups of paint and show your toddler how to take it from the cup and slightly press on the canvas. The point is to paint the outside of the paper heart.
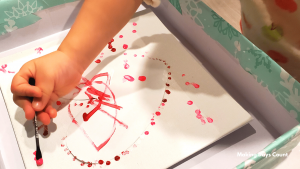
4. As you can see, painting with a toddler does not always happen as you might image. This is how the canvas looked after my toddler was done painting with it.
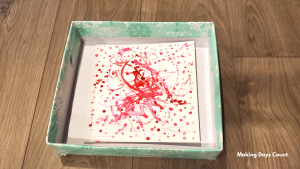
5. When the paint is dry, slowly remove the paper heart from the middle of the canvas. Here is what mine looked like. Keep the paper heart as you will need it for one of the later projects in this blog post. 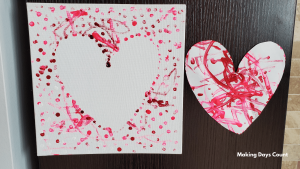
This is a great idea for one of the Valentine’s day gifts as it shows the creativity and also a practical gift that can last for a long time.
4. Heart shape toilet roll print card
What you need:
- Construction Paper (you can get some online here)
- Painter’s tape
- Paint (Red, Pink, White Acrylic Paints)
- Cups for Paint
- Empty Toilet Rolls
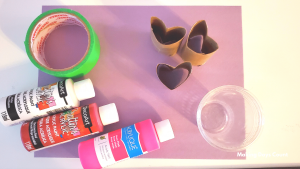
Here are the steps:
1. Prepare your paint station. Using the same box cover that I did for DIY#3, I folded my construction paper in half vertically.
2. I taped the card on the box with painter’s tape. This is to secure the card on the box and also to create a clean border around the card.
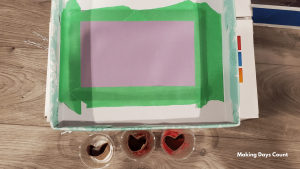
3. Next, I press the end of the toilet roll to form the shape of a heart and put them in the paint cups (as seen in picture above).
4. Using the toilet roll as the stamp, I asked my toddler to stamp the card randomly.
I would encourage her to try using the different colors to stamp.
You might need to help press it down a little as it might not fully show the shape of the heart depending on how they stamp the card.
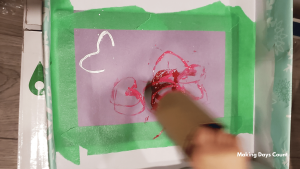
5. Once your toddler is done stamping, let your card dry before removing the painter’s tape.
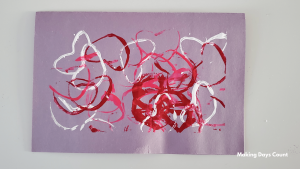
This card is pretty messy, but I love it!
5. Marble paint card for Valentine’s day
What you need:
- Construction paper (you can get some online here)
- Painter’s Tape
- Outline from the Paper Template (free download)
- Marbles
- Paint (Red, Pink, White Acrylic Paints)
- Cups for Paint
- Old Box Cover (or just a box)
Here are the steps:
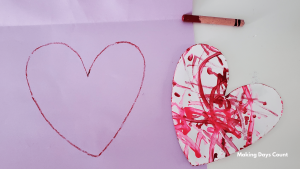
1. Using the free template, cut out the inside of the heart out. If you did DIY#3, cut out the remaining part of the template following the lines.
2. Fold your construction paper or cardstock in half, just like a card. Then, tape it onto the box cover or a box with painter’s tape.
I also found it helpful to put painter’s tape under the paper to secure it onto the construction paper.
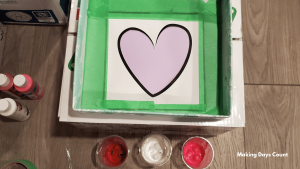
3. Next, put your marbles in the paint cups. Mix it around so that it is filled with paint.
4. Pour out your marbles onto the construction paper.
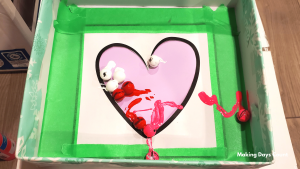
5. Assist your toddler in rolling the marbles all around the card.
This can get messy real quick. If you need more paint, just put the marbles back into the paint and then pour it out again.
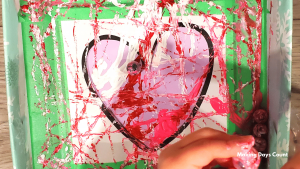
6. Once you are done, let it dry before removing the paint.
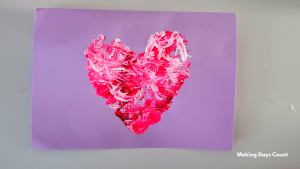
What do you think? This is a simple way to paint and looks so beautiful as a Valentine’s day card.
6. Yarn wrapped hearts
What you need:
- Thin Cardboard
- Paper Heart (Free Template download)
- Pencil
- Scissors
- Pink Yarn from the Dollar Tree (here is an alternative)
- Hot Glue
Here are the steps:
1. Using the heart template, trace it out on thin cardboard. I suggest using thin ones so that it is easier for you to cut. However, you can use what you have at home.
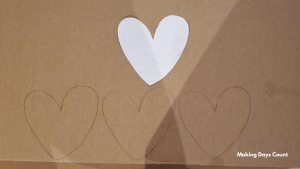
2. Put a bit of hot glue on the back of the cardboard and press the end of the yarn firmly on it.
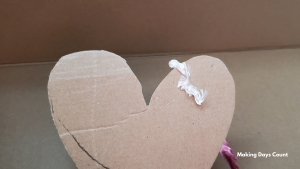
3. Now wrap the yarn around the cardboard in all directions until you cover the cardboard completely with yarn.
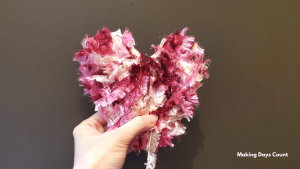
4. Once you are done, cut the yarn and hot glue it down to secure it.
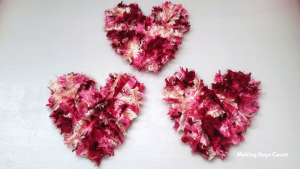
You can make as many and as thick as you want.
5. Display them nicely or give them away as Valentine’s day gifts.
7. I love you to pieces
What you need:
- Construction Paper (you can get some online here) (I used the inside of the card from DIY #5)
- Paper Heart (here is the template from DIY #5)
- Crayon
- Tissue Paper (I used blue, pink, and red)
- Glue
Here are the steps:
1. Decide if you want to have this on the outside part of inside part of a card, or just a piece of paper.
2. For me, I wanted to include it as part of the DIY#5’s card. Opening the card up (after it dried), using the heart template from DIY#3, I traced out the heart using a crayon.
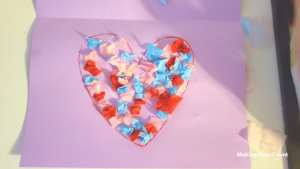
3. Then taking some colored tissue paper, I cut them into small pieces (roughly around 1″ x 0.5″ each).
If your toddler is not familiar with folding the tissue paper into smaller bits, you will want to show them how to. This takes some time but it also helps them focus on the task.
4. Put a bit of glue in the heart, take the folded tissue paper that you and your toddler folded and stick them in the heart.
The reason why you want to put the glue in the heart and not on the tissue paper is to make sure that most of the tissue paper is where you want it to be.
Of course, my toddler started taking the glue and putting it on the top of the card and sticking some tissue paper there too.
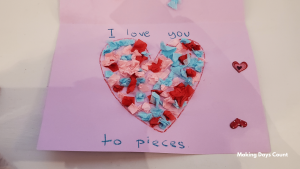
5. Once you are done sticking the tissue paper, you can write “I love you to pieces” on the top and bottom of the card.
If you would like your toddler to continue decorating, you can give them some stickers or crayons to draw around the card.
Since we are giving it to grandma, I’m sure grandma loves the personalized card though it might be filled with random stickers and drawings.
I hope that you enjoy making these Valentine’s day gifts DIYs with your toddler. They might be interested in some more than others, but that is okay. Do what you feel that is best to express your love and also have fun with it!
Related:
- Valentine’s Day Date Ideas under $50
- Meaningful Valentine’s Day Gift Ideas
- 7 Gifts for Him under $50
Thank you so much for reading my blog post on “Valentine’s Day Gifts on a budget”. Be sure to check out my flower templates kit here! If you like what you read, please pin the image below and share it with others. Thanks!
Leave a Reply