If you haven’t heard, we are going to Walt Disney World. I’m so excited because I have not been there for such a long time. We went to Disney Sea not too long ago, but that is different. This time, I am blogging my experience from beginning to end.
So far, I wrote about how we decided to go on this trip about a month before the actual trip. Also, it would not be right if I did not include a trip to the Dollar Tree. You know, to get items that can save me money and time later on.
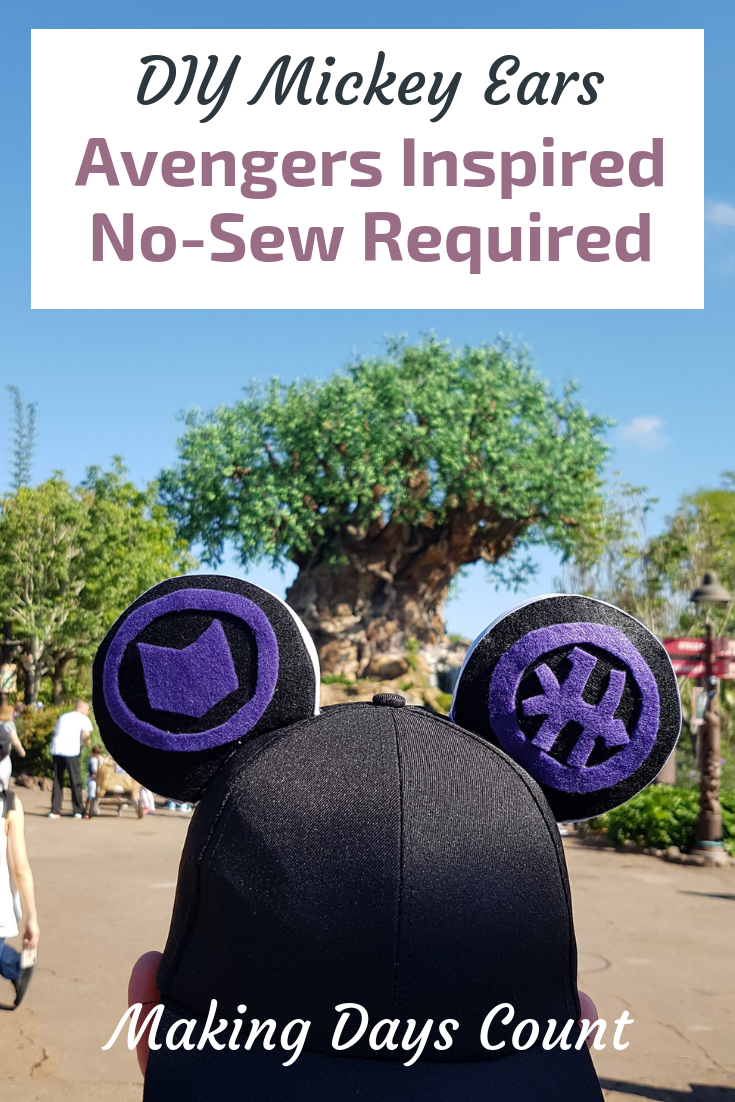
This is a part of my Disney series and today, I will be sharing how I made M’s custom homemade DIY Mickey Ears Cap: Avengers Edition.
Contents
Disney Series:
- How to plan a last minute Disney vacation
- Dollar Tree items to buy before you go to Walt Disney World
- This post on DIY Mickey Cap: Avengers Edition
- DIY Mickey Ears Headband: Floral Edition
- Walt Disney World All-Star Sports Resort Review
- Visiting Disney World’s Magic Kingdom with a baby
- Be Our Guest Restaurant Review
- Ohana Restaurant Review at Walt Disney World
- Visiting Disney World’s Epcot with a baby
- Sanaa Restaurant Review at Animal Kingdom Lodge
- Visiting Disney World’s Animal Kingdom with a baby
- Rookie’s Guide to Disney World Magic Bands
- Disney World Fastpass: A No-nonsense Guide
- Free Disney Non-Park Things to Do
- Disney Magical Express: A Review
- Disney Shadow Box: A 10 Minute Guide
Why DIY?
At first, I was thinking about whether I should buy Mickey Ears for M and myself. There are so many cool ones on Etsy. People are super creative, and if you rather buy than spending time and effort on making your own, I highly recommend for you to check out Etsy.
I had some time, just not enough for people to make them and send them to me. Side note: I had less than a month so either I DIY or buy them at the Disney Store. Mentioning this to M, I wanted to try to DIY with materials from the Dollar Tree.
With a goal to make a Mickey Ears cap, I turned to Pinterest and YouTube for research. There were suggestions to sew and glue felt, but they look so thin. I wanted my DIY Mickey Ears cap to have more weight to it.
After searching through tutorials, (while Baby K was napping) I found this no-sew tutorial by WDW Couple that teaches how to make these fabulous DIY Mickey Ears. Check out the video on a separate tab so you will see how to make it in video form. See below for my step by step broken down.

Step by Step on how I made my DIY Mickey Ears Cap:
BY CLICKING THE LINKS AND MAKING A PURCHASE, I MIGHT BE EARNING A SMALL COMMISSION AT NO ADDITIONAL COST TO YOU. PLEASE SEE OUR FULL DISCLOSURE FOR MORE DETAILS.
First, here are the materials I used for this DIY:
- Black Cap
- Black Felt
- Purple Felt
- Thin Solid Colour Ribbon
- Filling for Ears
- Hot Glue
- Cardboard
- Scissors
Most of these items you can get from your local dollar store. I even got the stuffing for the ears at the Dollar Tree. Read on for details later.
I think I spent less than CAD $7. That’s an amazing price!
For the Mickey Ears template, be sure to go to the WDW couple video and press on the link in their description for it.
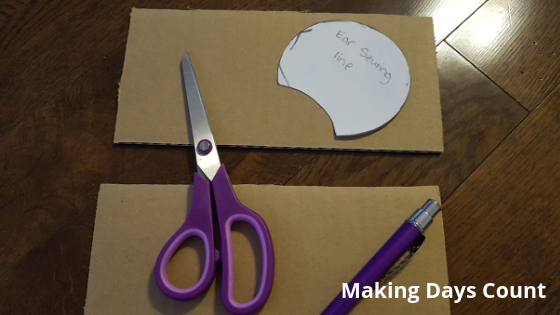
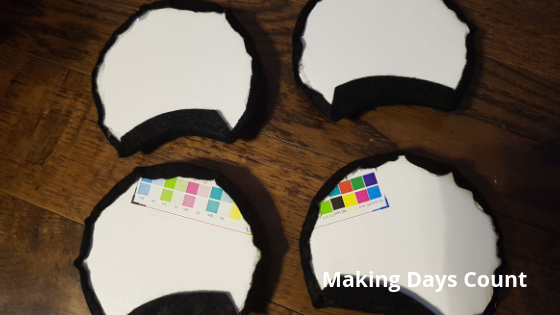
Step One: Cut the Cardboard with the Mickey Ears Template
Draw out 4 Mickey ears using the “Ears Sewing Line” template that you downloaded and printed. The cardboard I used was from the disposable diapers box. I found that it is easier to cut when I space the ears out and not too close to each other.
This is what they should look like when you are done cutting the cardboard.
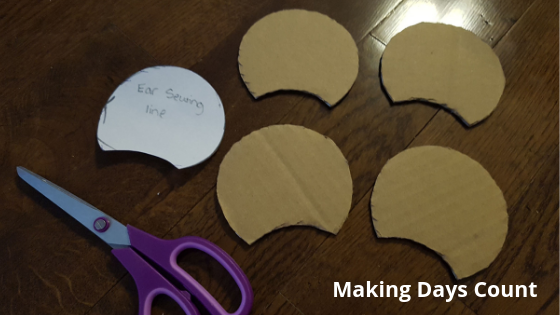
I also put the cardboard ears back-to-back to see which ones I want to pair together. Then, I put either 1 or 2 on the inner part of each cardboard ear.
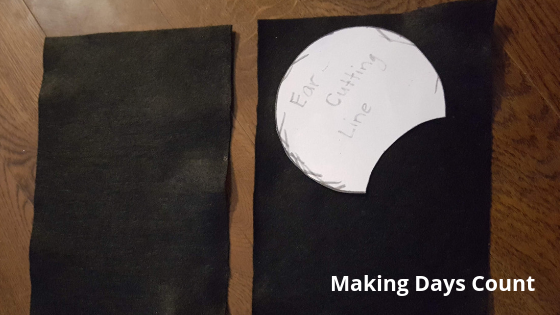
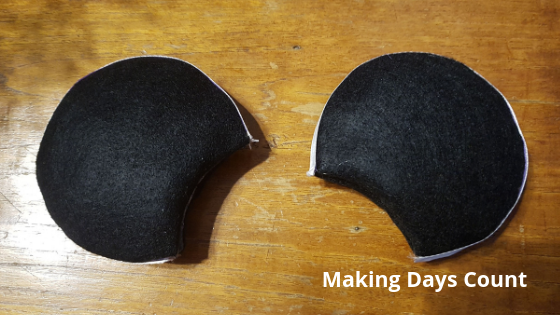
Step Two: Cut the Black Felt
Using the “Ear Cutting Line” template, cut out the black felt. I used felt instead of using a Disney print fabric. Since it’s a last minute (ish) trip, I needed to be creative to get the look I wanted. The black felt would make it look like Mickey Ears. Stay tuned for the Avengers addition at the end.
Tip: If I do this again, I would cut it wider than the template so that I can wrap it with ease. When I put hot glue in the back to secure the felt, it would be a lot easier and less worrying about burning my fingers.

Step Three: Secure the felt on the cardboard
Put hot glue at the edge of the cardboard and wrap the felt around it. Remember how you numbered the cardboard? The felt will be on the other side of the cardboard, the “outer” side.

Do it in sections. Start from one corner to the other corner. Leave the bottom open as you will need to stuff the ears, which is the next step.
Step Four: Insert stuffing
Here is a hack: (Warning: Graphic) I bought a stuffed animal from the Dollar Tree and reused the stuffing for the Mickey Ears.
I know, how could I? Just don’t let others know and definitely not the kids. I got the tip from a DIY YouTube channel actually. You don’t need a lot of stuffing so the stuffed animal doesn’t look bad after you are done. You can sew it back up and no one would know.
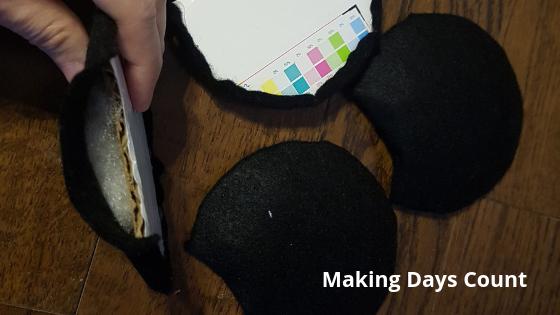
Once you stuffed the ears, use hot glue to secure the closing at the bottom of the ears.
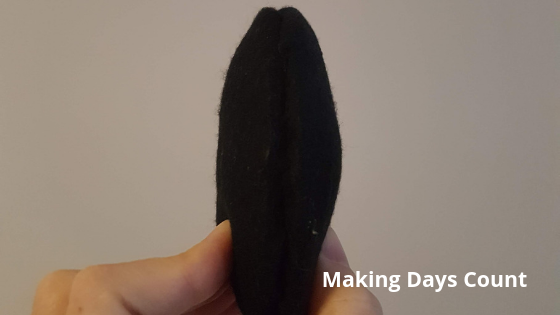
Step Five: Hot Glue the Ears Together
Match the ears you numbered and glue them together. Add a little pressure to make sure that they stick well together.
Step Six: Add Ribbon of choice
The mistake I made was to get a translucent ribbon so I had to get a solid colour ribbon. Please get a solid colour ribbon.
Measure the ribbon from one end of the ear to the other end. Secure it on with hot glue.
Step Seven: Put the DIY Mickey Ears on the Cap
Due to the lack of my sewing skills, I just estimated where I want the ears to go on the cap and use hot glue to glue it on.
Wear it to see if it is exactly where you want them to be. Also, get a second opinion to make sure that it is straight and align with each other.
Once you are done, you have a plain DIY Mickey Ears Cap.

If that is all you want, then you can stop reading. Next up is how to customize your Mickey Ears.
Step Eight: Customize Your DIY Mickey Ears Cap
M likes the character Hawkeye from the Marvel comics. I wanted to incorporate that into the DIY Mickey Ears cap. My thoughts were that I would add the Hawkeye mask and maybe the Avengers logo. One ear would be the mask and the other ear be the logo.
I even found felt sheets with the exact purple that represents Hawkeye. It’s truly meant to be, right?
When I discussed this with M, he loved the idea but sent me two Hawkeye classic icons instead.
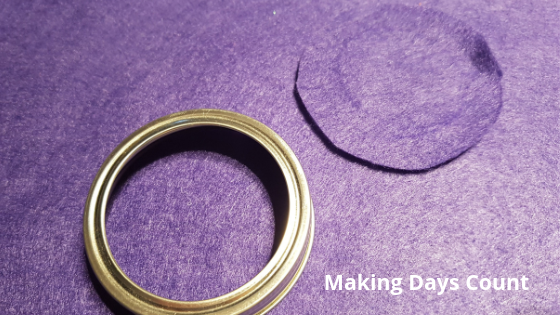
For the outer circles, we found a mason jar cover that was the perfect size fitting within the Mickey Ears.
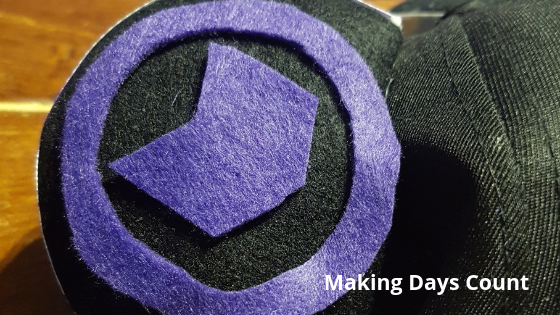
I decided to tackle the easier icon first. Cutting out the outer circle, then the inner circle. I estimated around 1cm difference between the two. If you prefer accuracy, please use a circle compass (we couldn’t find ours).
Use the leftover felt to cut the inner V icon. I folded the felt in half to get equal sides. Some might prefer to draw it out first. Do what you are comfortable with.
With the second Hawkeye icon, we were more systematic to draw it out on a piece of paper. I got M to draw it out as he wanted it to be really straight. Using the template he made, I cut it out before using a marker to draw it on the purple felt.
You will need two of each for the front and back of your DIY Mickey Ears.

Once completed, glue them on with hot glue. You are done. Hooray!
Whew, this was a long post but so much fun to write. Be sure to come back and read the other Disney blog posts. The next one is making my DIY Mickey Ears floral headband.
Don’t forget to check out the previous post of the Disney Series:
- How to plan a last minute Disney vacation
- Dollar Tree items to buy before you go to Walt Disney World
- This post on DIY Mickey Cap: Avengers Edition
- DIY Mickey Ears Headband: Floral Edition
- Walt Disney World All-Star Sports Resort Review
- Visiting Disney World’s Magic Kingdom with a baby
- Be Our Guest Restaurant Review
- Ohana Restaurant Review at Walt Disney World
- Visiting Disney World’s Epcot with a baby
- Sanaa Restaurant Review at Animal Kingdom Lodge
- Visiting Disney World’s Animal Kingdom with a baby
- Rookie’s Guide to Disney World Magic Bands
- Disney World Fastpass: A No-nonsense Guide
- Free Disney Non-Park Things to Do
- Disney Magical Express: A Review
- Disney Shadow Box: A 10 Minute Guide
If you like this post, pin it and share it with your friends.
Leave a Reply