Going to Disney is always exciting! Whether it is your first or 50th time, going to the happiest place on Earth is so much fun.
If you have been reading my Disney series, thank you very much. If you are new, hi and welcome. This is a new series where I blog my experience planning this trip from beginning to end.
Contents
Here are the other posts to catch up:
- Planning a last minute trip to Disney World
- Dollar Tree Items to buy before your trip
- DIY Mickey Ears Cap: Avengers Inspired
- DIY Mickey Ears Headband: Floral Edition
- Walt Disney World All-Star Sports Resort Review
- Visiting Disney World’s Magic Kingdom with a baby
- Be Our Guest Restaurant Review
- Ohana Restaurant Review at Walt Disney World
- Visiting Disney World’s Epcot with a baby
- Sanaa Restaurant Review at Animal Kingdom Lodge
- Visiting Disney World’s Animal Kingdom with a baby
- Rookie’s Guide to Disney World Magic Bands
- Disney World Fastpass: A No-nonsense Guide
- Free Disney Non-Park Things to Do
- Disney Magical Express: A Review
- Disney Shadow Box: A 10 Minute Guide
I made the Mickey Ears Cap for my hubby M and wanted to make a DIY Mickey Ears Headband for myself.
If you rather buy customized Mickey Ears headband, I definitely recommend Etsy. People are so creative and offer personalized ones if you are interested.
Since this was a last minute trip (less than a month to get my Mickey Ears headband), it would make sense for me to try to make it myself. If I ordered, it wouldn’t be guaranteed that it would arrive in time and expedited shipping to Canada can be costly.

How did I decide on which style I like?
I browsed through Pinterest to see what seems to be the easiest to DIY. There is the regular DIY Mickey Ears headband. If you want to make one, I highly recommend this video from the WDW couple. It is where I learned how to make the DIY Mickey Ears for M’s cap.
There is this other one where the ears are made from wire and had flowers in front of it. When I saw it, I knew that was it!
During my trip to the Dollar Tree, I picked up the materials and got to work after M’s DIY Mickey Ears Cap.
Here is how you make your own DIY Mickey Ears headband – Floral edition:
BY CLICKING THE LINKS AND MAKING A PURCHASE, I MIGHT BE EARNING A SMALL COMMISSION AT NO ADDITIONAL COST TO YOU. PLEASE SEE OUR FULL DISCLOSURE FOR MORE DETAILS.
Materials you need for this project:
- Headband
- Thin ribbon (1/2 inch or less)
- Hot glue
- Craft wire
- Faux flowers
- Faux greenery
- Tape
- Scissors
Update after trip: You will need super glue as well
All of these were bought at the Dollar Tree or the dollar store. I had some of the items from my previous craft projects such as the craft wire and faux greenery. The total cost is less than CAD $10.
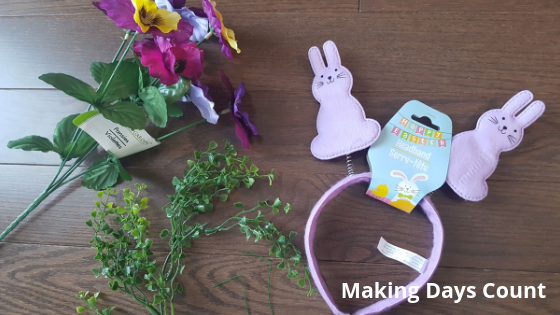
Step One: Prep your headband
When I got the headband, it was an Easter headband. I removed all the frills and stripped it until it was just a plain black headband.
If you already have a plain headband, that’s great.
Step Two: Wrap your headband with the ribbon of choice (Optional)
If you are happy with the colour of your headband, great! If not, slowly but tightly wrap the headband from one side to the other with your ribbon in a circular motion. Add hot glue to secure the ribbon to the headband occasionally.
Step Three: Make your Mickey Ears with Wire
There are a few ways to make these ears. One of them is to use a mason jar and wrap your wire around it, leaving about two inches open for the bottom part of your ears.
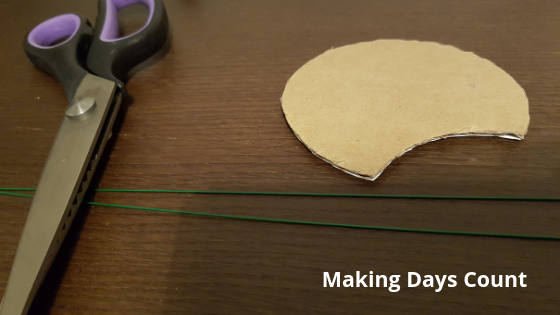
Another way, which I did, was to use the Ears template I downloaded for free provided by the WDW couple. Please click on the link and see the video and template link in their description box. It is also where I got my inspiration for my DIY Mickey Cap.
I cut out a cardboard version of the template and shaped my wire around it.
Update after the trip: I would highly recommend using a galvanized wire instead of floral craft wire because the shape didn’t hold well after the flight and in my bag.
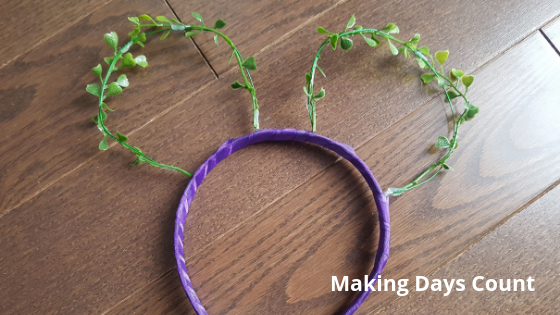
Step Four: Cover the wire with greenery
This part is optional as well. If you like to leave the wire as is, that is perfectly fine. However, you can also take it to the next level and add greenery around your wire.
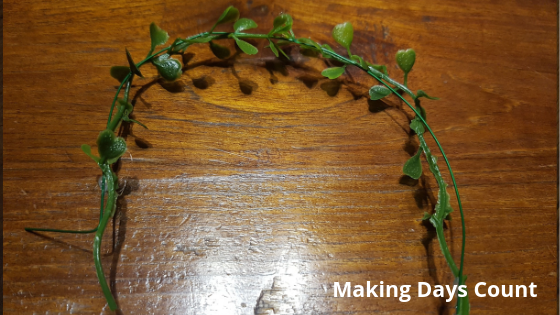
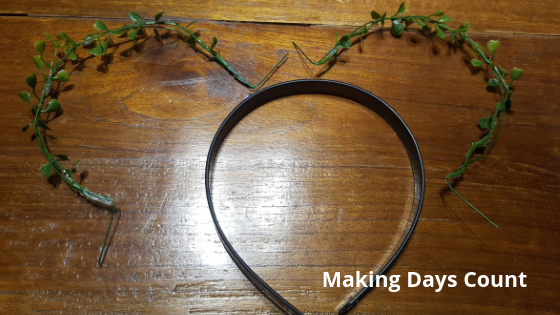
Once again, use hot super glue to secure to the wire.
Step Five: Secure your Mickey Ears
Use hot glue or super glue to secure your Mickey Ears to the headband.
Step Six: Add your flowers to your headband
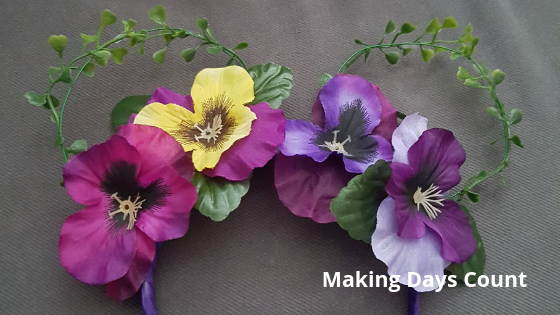
Cut and separate your dollar store flowers from its stems. Estimate where you want each flower to be before glueing them on. I would suggest that you add super glue in addition for extra reinforcements.
Step Seven: Test it out
Now you’re done! Try it out for a few days to make sure that it is comfortable for you. Enjoy your creation and be proud of it when you wear it to the parks.
If you prefer to get someone to make it for you, be sure to check out Etsy. There are so many talented people who can make it and ship it to you.
Want to read more about my Disney adventure:
- Planning a last minute trip to Disney World
- Dollar Tree Items to buy before your trip
- DIY Mickey Ears Cap: Avengers Inspired
- DIY Mickey Ears Headband: Floral Edition (this post)
- Walt Disney World All-Star Sports Resort Review
- Visiting Disney World’s Magic Kingdom with a baby
- Be Our Guest Restaurant Review
- Ohana Restaurant Review at Walt Disney World
- Visiting Disney World’s Epcot with a baby
- Sanaa Restaurant Review at Animal Kingdom Lodge
- Visiting Disney World’s Animal Kingdom with a baby
- Rookie’s Guide to Disney World Magic Bands
- Disney World Fastpass: A No-nonsense Guide
- Free Disney Non-Park Things to Do
- Disney Magical Express: A Review
- Disney Shadow Box: A 10 Minute Guide
Like this, pin it! Share it on Pinterest

Leave a Reply